MLOps, CI, and development flows using Databricks
I wrote this about a year or two ago while I was still working a lot with Databricks. It was right around the time where "MLOps" and "ML Engineering" were starting to get kind of hip and posting then probably would have been a better idea 🤪.
I was very frustrated by the machine learning workflow vs. what I am used to while developing web apps - it honestly felt like stepping back in time about 10-15 years. Like, you know, when you're learning to program and before you know about source control or automated testing. Except much slower because there is a ton of data that the ML training has to slog through. And the data science code that I've seen, while genius in its way, hasn't been written with maintainability in mind. Anyways, the good folks at Databricks pointed me to some resources and talked me through what they often saw, and I also rolled up my own sleeves. Hopefully this is still relevant for you.
Working with notebooks is a lot different than your standard dev environment, and the notebooks themselves make it easy to get lazy and have a bunch of spaghetti code lying around. Plus, you have to figure out a whole different way to work, integrate with source control, integrate with others, and run your automated tests.
We’ve gone through a couple of iterations for organizing projects, and have talked to Databricks about how they structure their own. This is what we’ve come up with and what we’ve been using for our ML project. So far, we're pretty happy with it - it’s not much different than a lot of Git-based development workflows + it has scaled well so far beyond one developer + across multiple different environments.
This is intended as a framework for future machine learning projects. No doubt there is room for improvement, so feel free to experiment and report back.
Workflow
In terms of a workflow, I’m a fan of something similar to GitHub Flow (or there are a million variants).
The flow goes roughly like:
- Open a branch per change
- Commit your code into that branch
- Open a pull request in GitHub
- Go through some code review
- Make changes (or not)
- Merge
- Deploy
- Repeat
Structure
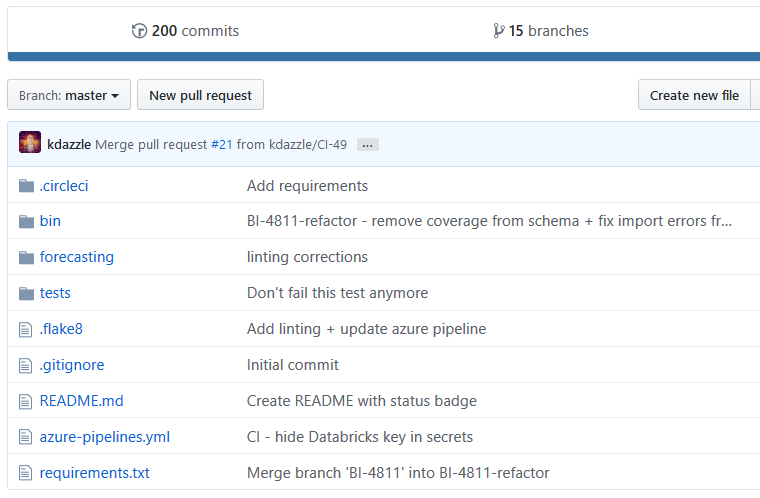
Here is our ideal directory structure for the project.
|ProjectName/  -- the project root
----| azure-pipelines.yml
----| requirements.txt
----| README.md
----| .gitignore
----| scripts/
----| tests/
----| forecasting
--------| __init__.py
--------| conf/
--------| ModelTraining.py
--------| set_environment.py
A lot of these are explained in the Databricks section, so I’ll just go over the rest of them here:
- azure-pipelines.yml - this is the config for our CI system (Azure Pipelines)
- requirements.txt is your standard python file for listing your project’s requirements. It’ll be used by your package manager.
- README.md - standard git repo readme. .md is a markdown file
- .gitignore - all of the files you don’t want to store in source control
- tests - the root for all of your tests. There are other places to put this, and it’s mostly a matter of preference.
- The way everything else is set up, if you put it under
forecasting, then you'll send it up to Databricks all the time, so I kept it outside.
- The way everything else is set up, if you put it under
- scripts - if you have any helpful scripts for your project (like deploying your code to Databricks (see script in appendix)), this is the place for those
- forecasting - the top level python module. It contains all of the notebooks. Name it something that will make sense when you're importing it in your code.
There's some room for debate here...for this project, we kept the machine learning library separate from this code, since we think it'll have some broader use. But if you don't think that's the case, you might want to rename forecasting to be something like forecasting_notebooks, and then your machine learning library source would be a separate dir under root.
Databricks
Workflow
Databricks is great, but we’ve found it’s better to pull a lot of your code out into regular python packages and import them into your notebook. That’s better because:
- You can write + run automated tests locally
- Refactoring is much easier in a real IDE
- We had a lot of trouble pickling classes that were defined in notebooks - so you’ll need to do this for a lot of machine learning
- Fiddling with the Databricks-git integration is a bit of a pain
- It’s easier to treat your Databricks environment as disposable + see Git as the source of truth.
- Not sure if the Databricks code is out of date? Just overwrite it with your local copy
This is how we import our package at the top of our databricks notebook:
dbutils.library.install("dbfs:/libraries/StructuralChangeDetectionModel-0.4811.2-py3.7.egg")
dbutils.library.restartPython()
Databricks directory structure
Looking at the directory structure from within Databricks, it looks like this. It mostly mirrors the structure of your project on GitHub except for the autogenerated CI directory, and where your local code is written.

|ProjectName/ - should be accessible by all people in the project - ie, not in your personal folder
----| master/ - the production copy of your project
--------| conf/
------------| production_config.py
------------| ci_config.py
------------| kyle_config.py
------------| joe_config.py
------------| ci_set_environment.py
--------| set_environment.py
--------| Model training notebook.py
----| CI/ - where your CI script will store all of its builds - these are autogenerated
--------| 49-master/  - the build number + the name of the branch being built, for example
--------| 37-BI-5613/
----| libraries/
----| BI-4810/ - not part of source control; feature/dev/bugfix branch
----| BI-5613/ - not part of source control; feature/dev/bugfix branch
To explain…
- ProjectName - Your Databricks project root. Obvs name this something that makes sense for your project.
- Contains all of your project files - nothing for your project should be outside of this (in Databricks)
- master - contains the project files that should be used for production. Mirrors the directory in GitHub where your code lives
- conf - contains files that define the constants that you’ll be using for your project on a per-environment (and/or per-developer) basis. Things are split up so that it’s easy to switch between environments.
- The files in here shouldn't contain a bunch of util functions or anything - those can be defined in a real notebook or in your library. This should pretty much just be constants - especially the ones that change between prod and dev
- production_config - the base config. I prefer when everything inherits from production because you can see exactly what changed and there’s not as much duplication. But other people like doing a base_config and then branching off from there. Either way, this will contain all of the constants you need for your prod environment.
- ci_set_environment - this is just used by the CI script - it sets the environment for the CI job
- ci_config/kyle_config/joe_config - Environment-specific settings. Ie - the CI environment vs Kyle’s dev environment vs Joe’s dev environment. You can set the delta files to your own sandbox, instead of overwriting prod, etc.
- set_environment - this is a one-line notebook that specifies which conf file to use
- BI-4810 + BI-5613 + etc… - These aren't stored in source control. When you send your local code up to Databricks, it would write everything into these directories (see the script at the very bottom of this post). These are just examples of feature branch/bug fix folders - feel free to name them whatever you want. I personally like using the issue number.
- It’s basically the same as master except some of the files will be different, because you’re adding a feature or fixing bugs.
- Another option is to use separate folders for each of your developers (ie. a KyleDev + JoeDev folder). This is actually what Databricks suggested, but I don't really like the option because...
- I found that it doesn’t work super well if multiple people are working on the same issue. For instance, if you have a data engineer + a data scientist.
- Having separate folders per branch mirrors GitHub flow closer, which is nice.
- On long-lived branches, you’re more likely to diverge from master and fall into bad habits.
- CI - the folders in here will be automatically created by your CI script, if you have that set up. It comes in handy if you’re trying to fix an issue that caused integration tests to fail.
- libraries - contains dependencies that need to be added to your cluster - should contain the versions used for master.
- If there are any changes - if you’re upgrading one of the libraries and it’s troublesome, for instance - then add a libraries subdirectory to your feature branch folder so that you don’t crash production.
set_environment
Here it is in its entirety
%run ./conf/ci_config
And replace ci_config with whichever config you want to be using.
set_environment vs conf
The reason that we need a set_environment file is so that it's easy to switch between environments (prod and dev) without having to edit a real notebook. It decouples the environment from the code.
For example, what if we didn't have a set_environment file, and just specified whichever config file at the top of our Model Training notebook? Then everytime we were making a change, we'd have to remember to change our conf file reference first, and then change it back to prod before we commit the file to source control. And chances are that we would eventually use our prod settings in dev, or our dev settings in prod. Meaning that we could overwrite an important delta file, or not realize that our "prod" run has actually just been a "dev" run for a few weeks.
Or how would you dynamically set the environment? With CI, for example. You'd have to do some string parsing and remove the 3rd command from the top of the notebook or whatever, and it would be kind of messy and brittle. With the set_environment file, CI just needs to dump a single line into a new file for everything to work.
Secrets
Secrets (any sort of key or password) should be stored in Azure Key Vault or Databricks secrets.
Secrets should never be put directly in a Databricks notebook unless you clear the revision history afterwards. Otherwise, anyone with access to the notebook will be able to go back and find them.
Security! Connecting to data sources
One important point is that we don't want to mount the data lake as a drive due to security concerns. If we do that, then anyone with access to the Databricks instance can see everything in the data lake. By providing the oauth tokens, we can control access better.
See the Databricks docs for more info.
Continuous Integration (CI)
This is still fairly new, but has actually saved a whole bunch of time already. Also, it really takes the mental weight off when you think about running a deployable version of your code.
The idea is that every time you push to GitHub, the job will run the model training notebook. That notebook runs on only a small subset of the data so that it goes quickly, meaning that you'll have to make your data source a little dynamic (ie - put it in your environment conf). The notebook can have some assert statements to make sure that things pass some baseline expectation. And then CI will tell you whether it passed or failed.
So it’s on you to define any asserts or tests inside of your notebooks, but otherwise, if an exception happens for another reason, it will fail and it will show that in GitHub.
So you’ll want to set something up in Azure Pipelines and configure your azure-pipelines.yml file (see the Git project structure)
import base64
import os
import time

from databricks_api import DatabricksAPI
from databricks_cli.workspace.api import WorkspaceApi
from databricks_cli.sdk.api_client import ApiClient


BASE_PATH = os.path.dirname(os.path.dirname(__file__))

# Pre-defined Pipelines variables
# See https://docs.microsoft.com/en-us/azure/devops/pipelines/build/variables?view=azure-devops&tabs=yaml
PIPELINES_BUILD_ID = os.environ['PIPELINES_BUILD_ID']
GIT_BRANCH_NAME = os.environ['GIT_BRANCH']

NOTEBOOK_DIR = '/Projects/ProjectName/CI/{}-{}'.format(
    PIPELINES_BUILD_ID, GIT_BRANCH_NAME)

api_key = os.environ['DATABRICKS_API_KEY']
headers = {
    'Authorization': 'Bearer {}'.format(api_key)
}

databricks = DatabricksAPI(
    host='https://eastus2.azuredatabricks.net',
    token=api_key
)


def send_code_to_workspace():
    client = ApiClient(
        host='https://eastus2.azuredatabricks.net',
        token=api_key
    )
    workspace_api = WorkspaceApi(client)
    workspace_api.import_workspace_dir(
        source_path=BASE_PATH,
        target_path=NOTEBOOK_DIR,
        overwrite=True,
        exclude_hidden_files=True
    )


def send_config_to_workspace():
    env_file_path = os.path.join(BASE_PATH, 'conf', 'ci_set_environment.py')
    set_env_file_contents = open(env_file_path, 'rb').read()
    set_env_base64 = base64.b64encode(set_env_file_contents).decode('ascii')

    # Create set_environment file
    databricks.workspace.import_workspace(
        path='{}/set_environment'.format(NOTEBOOK_DIR),
        content=set_env_base64,
        language='PYTHON',
        overwrite=True
    )


def wait_for_complete(run_id):
    stopped_states = ['TERMINATED', 'SKIPPED', 'INTERNAL_ERROR']

    sleep_time_seconds = 60 * 2
    run_info = {}

    status = None
    while status is None or status not in stopped_states:
        if status is not None:
            time.sleep(sleep_time_seconds)

        run_info = databricks.jobs.get_run(run_id=run_id)
        status = run_info['state']['life_cycle_state']

    return run_info


def execute_on_databricks():
    send_code_to_workspace()
    send_config_to_workspace()

    job_name = 'CI-{}-{}'.format(PIPELINES_BUILD_ID, GIT_BRANCH_NAME)
    cluster_info = {
        'spark_version': '5.3.x-scala2.11',
        'autoscale': {
            'min_workers': 2,
            'max_workers': 13
        },
        'custom_tags': {
            'cluster-purpose': 'CI-testing',
        },
        'node_type_id': 'Standard_F8s_v2',
        'driver_node_type_id': 'Standard_F8s_v2',
        'spark_env_vars': {
            "PYSPARK_PYTHON": "/databricks/python3/bin/python3",
        }
    }

    job_response = databricks.jobs.submit_run(
        run_name=job_name,
        new_cluster=cluster_info,
        libraries=[
            {'pypi': {'package': 'pandas'}},
            {'pypi': {'package': 'sentry-sdk'}},
        ],
        notebook_task={
            'notebook_path': '{}/ModelTraining'.format(NOTEBOOK_DIR),
        }
    )

    run_id = job_response['run_id']

    run_info = wait_for_complete(run_id)
    result_state = run_info['state']['result_state']
    if result_state != 'SUCCESS':
        print(run_info)
        raise Exception("Databricks run not successful - status {}".format(result_state))

    print('job id', run_id)


print(GIT_BRANCH_NAME, PIPELINES_BUILD_ID)

execute_on_databricks()
What that example script does is basically orchestrate sending the right version of code to Databricks + creating a cluster + executing the pipeline along with the assert tests + waiting for results.
In order for this to work, you’ll need to have a subset of data available in your Databricks CI conf settings, because the job needs to take like 25 minutes or less, or it will just fail. You want the fast feedback at this point, anyways. Eventually we’ll write something that can do a more complete run on the data.
Appendix
Helpful reads
Code
Azure-pipelines.yml
This is what we use for our project
# Python package
# Create and test a Python package on multiple Python versions.
# Add steps that analyze code, save the dist with the build record, publish to a PyPI-compatible index, and more:
# https://docs.microsoft.com/azure/devops/pipelines/languages/python

pr:
  autoCancel: true
  paths:
    exclude:
    - README.md

jobs:

- job: 'Test'
  pool:
    vmImage: 'Ubuntu-16.04'
  strategy:
    matrix:
      Python36:
        python.version: '3.6'
    maxParallel: 4

  steps:
  - task: UsePythonVersion@0
    inputs:
      versionSpec: '$(python.version)'
      architecture: 'x64'

  - script: python -m pip install --upgrade pip && pip install -r requirements.txt
    displayName: 'Install dependencies'

  - script: python -m unittest
    displayName: 'unittest'

  - script: python ./forecasting/ci/run_in_databricks.py
    displayName: 'Run in Databricks'
    env:
      GIT_BRANCH: $(Build.SourceBranchName)
      PIPELINES_BUILD_ID: $(Build.BuildId)
      DATABRICKS_API_KEY: $(DATABRICKS_API_KEY)

  - task: PublishTestResults@2
    inputs:
      testResultsFiles: '**/test-results.xml'
      testRunTitle: 'Python $(python.version)'
    condition: succeededOrFailed()
Send your notebooks to Databricks
Run this file like ./send-to-databricks.ps1 BI-4811. It was written for Windows, but a shell script should be similar.
# Send your current code to a dir in databricks. It will overwrite any conflicting files.


$SCRIPTPATH=$PSScriptRoot
$PROJECT_ROOT = (get-item $SCRIPTPATH).parent.FullName
$DATABRICKS_BASE_DIR="/Projects/ProjectName"
$BRANCH_NAME=$Args[0]
$DATABRICKS_DEST_DIR="$DATABRICKS_BASE_DIR/$BRANCH_NAME"
$LOCAL_CODE_DIR="$PROJECT_ROOT/forecasting/"

if ($BRANCH_NAME -eq $Null) {
    throw "No git branch/directory name"
}

echo "checking out $BRANCH_NAME into Databricks $DATABRICKS_DEST_DIR"

databricks workspace import_dir --exclude-hidden-files --overwrite $LOCAL_CODE_DIR $DATABRICKS_DEST_DIR
databricks workspace rm $DATABRICKS_DEST_DIR/set_environment

echo "Complete"
Deploy your library code to Databricks
You'll need to set up databricks-cli for this bash script to work. And be mindful, cuz this will overwrite everything.
SCRIPTPATH="$( cd "$(dirname "$0")" ; pwd -P )"

. $SCRIPTPATH/env/Scripts/activate
python setup.py bdist_egg
databricks --profile MYPROFILE fs cp -r --overwrite ./dist dbfs:/libraries
deactivate